
 Pin it
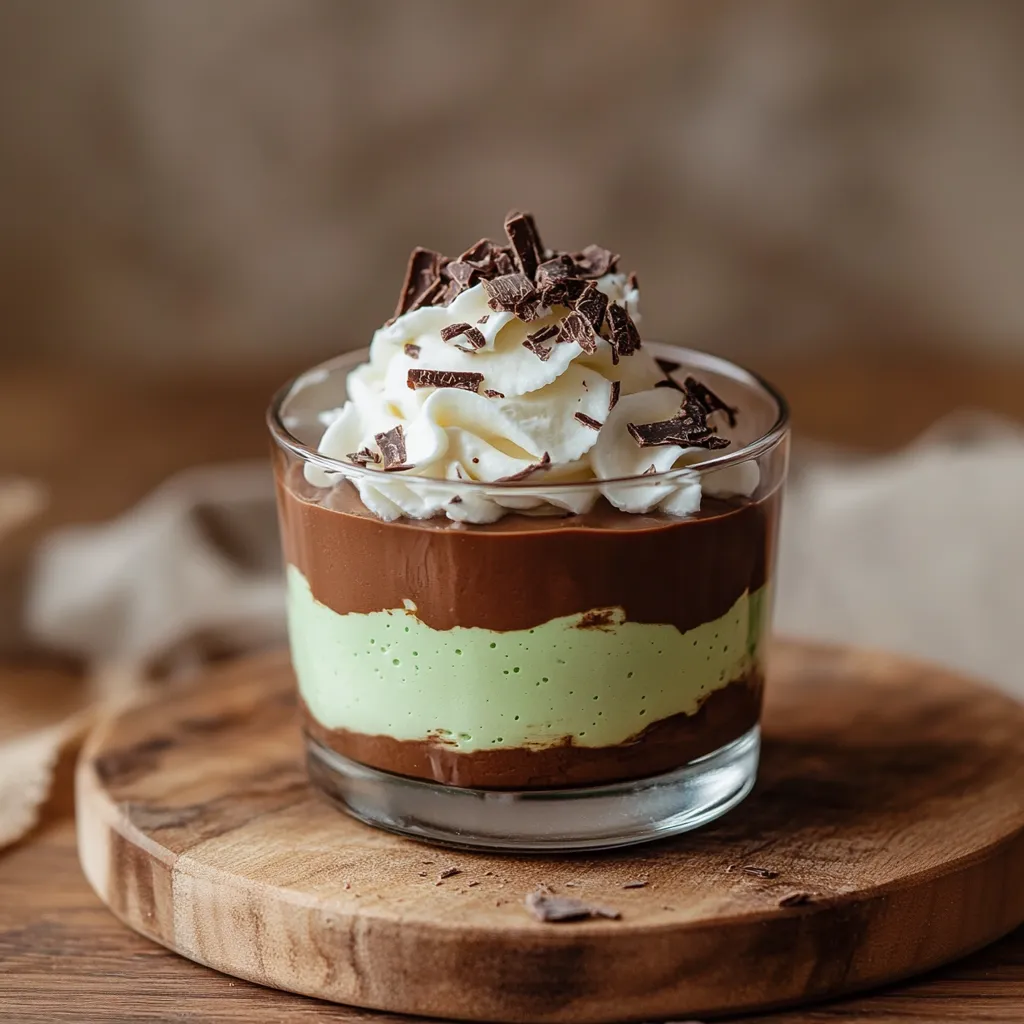
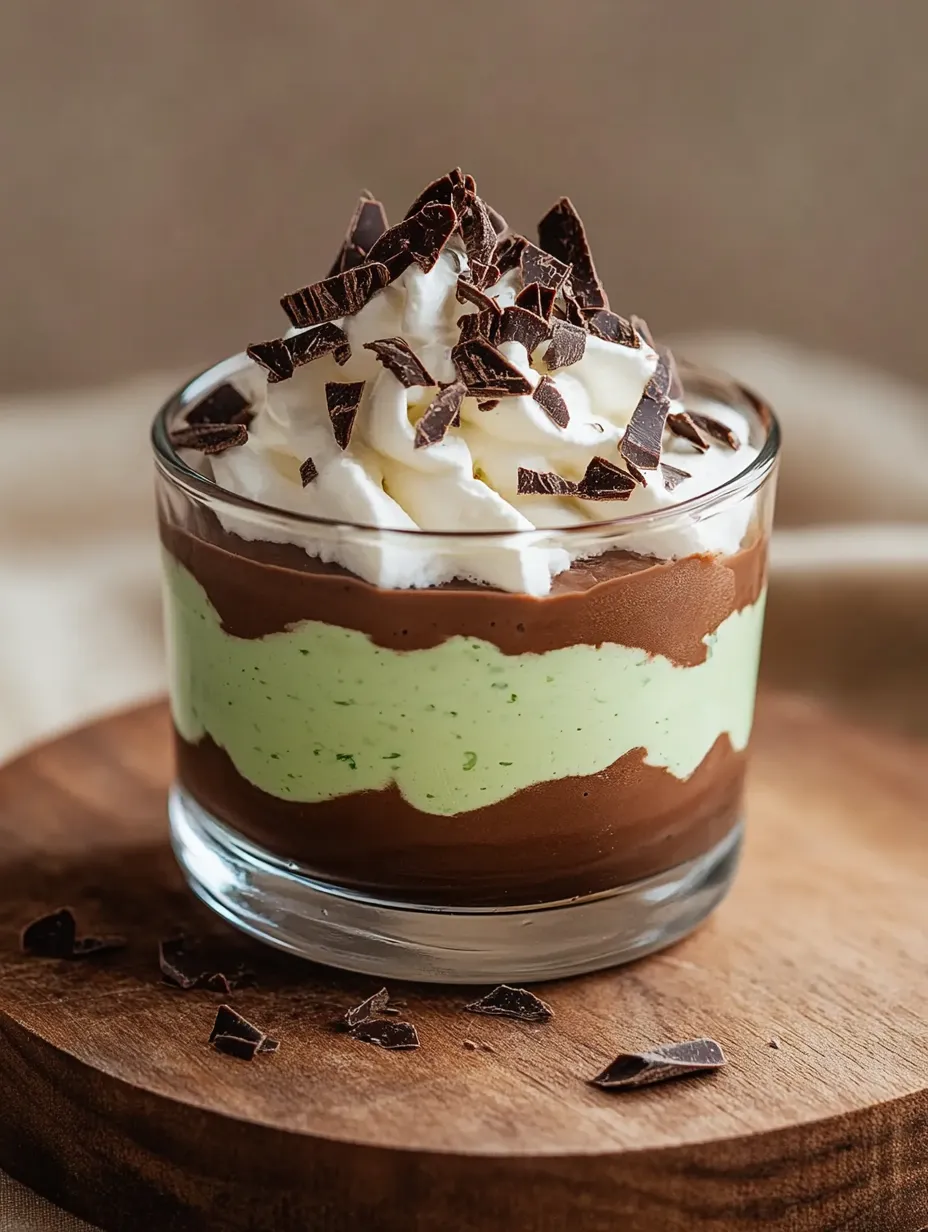
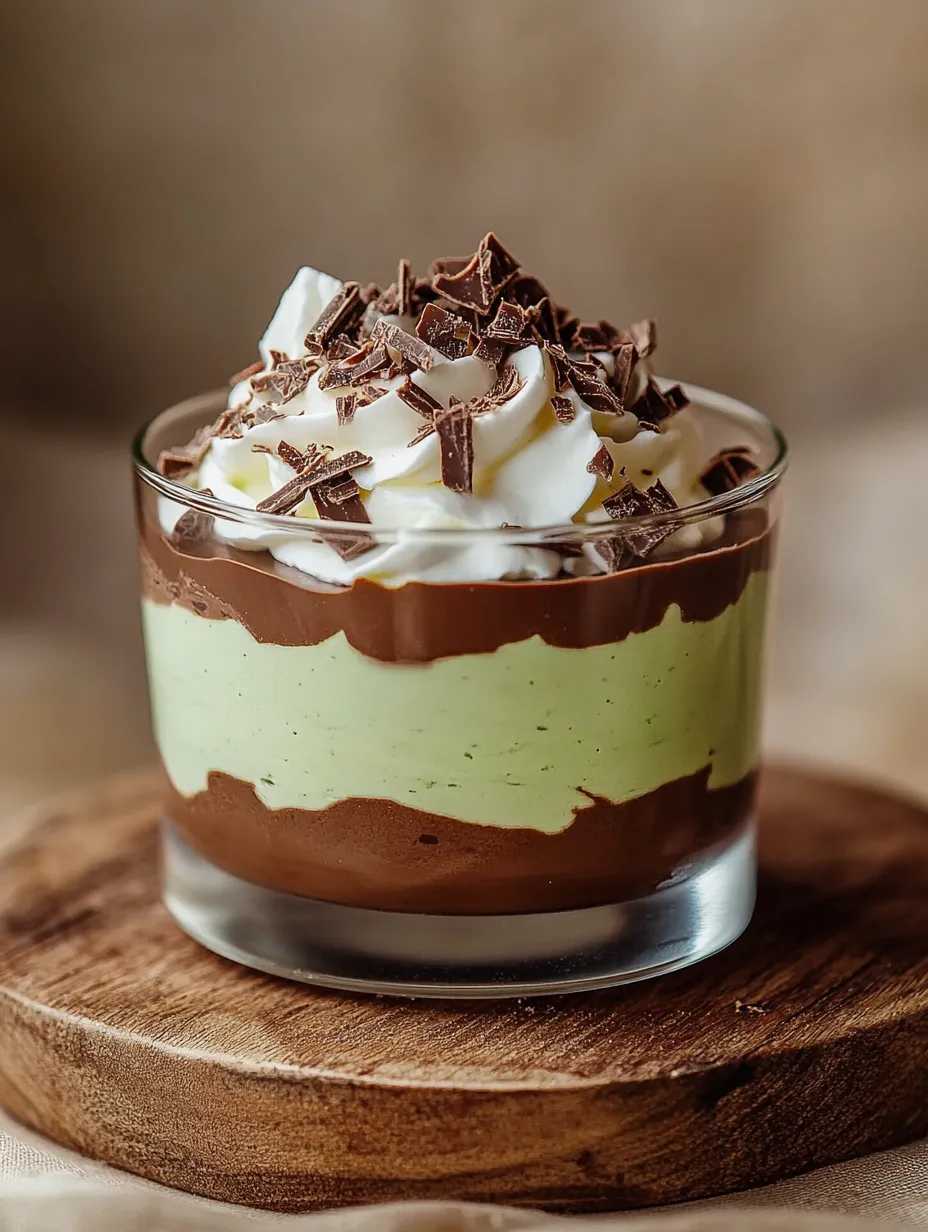
Shamrock shake pudding cups transform the beloved seasonal McDonald's treat into an easy-to-make layered dessert that brings festive St. Patrick's Day spirit to your table. These delightful cups feature alternating layers of rich chocolate pudding and cool mint pudding, topped with a cloud of whipped cream and festive garnishes. The striking color contrast creates a visual treat that's as appealing to the eye as it is to the palate—perfect for celebrations or simply adding a touch of Irish-inspired fun to an ordinary day.
I first created these pudding cups when looking for a last-minute dessert for a St. Patrick's Day gathering with friends. Everyone was immediately drawn to the beautiful layers, and they disappeared faster than any other dessert on the table. One friend's eight-year-old declared them "better than the real shamrock shake" because she got "chocolate too!" Now they're requested every March by family and friends alike.
Gathering Your Ingredients
- Chocolate pudding mix: Creates a rich, indulgent base layer; instant varieties work perfectly for quick assembly
- Mint pudding mix: Provides the signature minty flavor that makes these cups special; if you can't find mint pudding, see variations below
- Milk: Brings the pudding mixes to life; whole milk creates the richest texture, but any variety works
- Whipped cream: Adds a cloud-like finishing touch that enhances both presentation and flavor
- Green food coloring: Optional for intensifying the mint layer's color for maximum visual impact
- Chocolate shavings: Provide an elegant garnish and reinforce the chocolate flavor component
The quality of your garnishes makes a surprising difference in the final presentation. I've found that using a vegetable peeler on a good chocolate bar creates beautiful curls that look far more impressive than pre-packaged chocolate shavings. This small touch elevates these simple pudding cups to dessert-worthy status.
Mix The Chocolate Layer
In a medium bowl, whisk the chocolate pudding mix with cold milk until completely smooth with no lumps. Allow it to stand for about 5 minutes until it thickens to a spoonable consistency. The pudding should be fully set but still have a slight jiggle.
Prepare The Mint Layer
In a separate bowl, combine the mint pudding mix with cold milk, whisking vigorously to eliminate lumps. If using vanilla pudding with mint extract, add 3-4 drops of green food coloring for that signature shamrock shade. Let stand until properly thickened.
Create Beautiful Layers
Start with a layer of chocolate pudding at the bottom of clear serving cups or glasses. Use a piping bag for the cleanest layers, or carefully spoon the pudding to avoid smearing the sides of the glass. Add a mint layer next, continuing to alternate layers until cups are nearly filled.
Add The Finishing Touch
Top each cup with a generous swirl of whipped cream. If feeling fancy, use a piping bag with a star tip for a professional look. The white cream creates a beautiful contrast against the vibrant mint green layer.
 Pin it
Garnish With Flair
Finish with chocolate shavings, mint chocolate pieces, or a light dusting of cocoa powder. For extra festivity, add green sprinkles or a small mint leaf. These final touches add textural contrast and visual appeal.
Chill To Perfection
Refrigerate the completed pudding cups for at least 30 minutes before serving. This resting time allows the flavors to meld together while ensuring the perfect cool temperature and firm texture.
My nine-year-old daughter loves helping make these pudding cups, especially adding the green food coloring to achieve that perfect shamrock shade. She's convinced that counting to ten while stirring makes the green more magical, and who am I to argue with that kind of baking wisdom? These have become our special March tradition, bringing a little whimsy to the transition from winter to spring.
Serving Suggestions
Serve these festive pudding cups as the sweet finale to a St. Patrick's Day dinner of corned beef and cabbage. They're also perfect for school parties or office celebrations, bringing a touch of holiday spirit without requiring extensive decorating skills. For a family movie night around St. Patrick's Day, pair them with hot chocolate for a cozy dessert experience. The individual servings make them ideal for buffet-style gatherings where guests can easily grab a complete dessert.
Creative Variations
Transform these cups for different tastes and dietary needs. For a dairy-free version, substitute almond or coconut milk and dairy-free whipped topping. If mint pudding is unavailable, use vanilla pudding mix with 1/4 teaspoon mint extract and green food coloring. Create an adults-only version by adding a tablespoon of Irish cream liqueur to each cup. For a cookies-and-cream twist, add a layer of crushed chocolate cookies between pudding layers. Make a grasshopper pie-inspired version by adding a chocolate cookie crust at the bottom of each cup.
Make-Ahead Magic
These pudding cups can be completely assembled up to 24 hours in advance and stored covered in the refrigerator. For the freshest presentation, wait to add the whipped cream and garnishes until an hour or two before serving. If making further ahead, prepare the chocolate and mint puddings separately, store covered in the refrigerator, and assemble the cups the day of serving. This make-ahead capability makes them perfect for busy holiday entertaining.
 Pin it
I've found that these simple pudding cups have a way of bringing joy that far exceeds the effort required to make them. There's something magical about those vibrant green and chocolate layers that makes people smile even before they take their first bite. Whether it's the festive colors, the playful presentation, or the irresistible flavor combination, these shamrock shake pudding cups have become a cherished tradition in our home—one that marks the arrival of spring with a little sweetness and a lot of fun.
Frequently Asked Questions
- → Can I make these pudding cups ahead of time?
- Absolutely! You can prepare these up to 24 hours in advance. For best results, add the whipped cream topping and garnishes just before serving to maintain their fresh appearance.
- → What can I use instead of mint pudding if I can't find it?
- If you can't find mint pudding, use vanilla pudding mix and add 1/2 teaspoon of mint extract and green food coloring. Adjust the mint extract to taste, starting with less and adding more if needed.
- → Can I make these dairy-free?
- Yes! Use non-dairy milk like almond, coconut, or soy milk with instant pudding mixes (check that they work with non-dairy milk), and top with dairy-free whipped topping. Just be aware the pudding might not set quite as firmly.
- → What are some good garnish ideas besides chocolate shavings?
- Try crushed Andes mints, mini chocolate chips, chocolate cookie crumbs, green sprinkles, gold sugar crystals for a St. Patrick's Day theme, or even a small mint leaf for an elegant touch.
- → How can I make these for a party?
- For parties, serve in small clear plastic cups for easy portion control and visibility of the pretty layers. Make a pudding bar by preparing the layers in advance and letting guests add their own whipped cream and choice of toppings.