
 Pin it
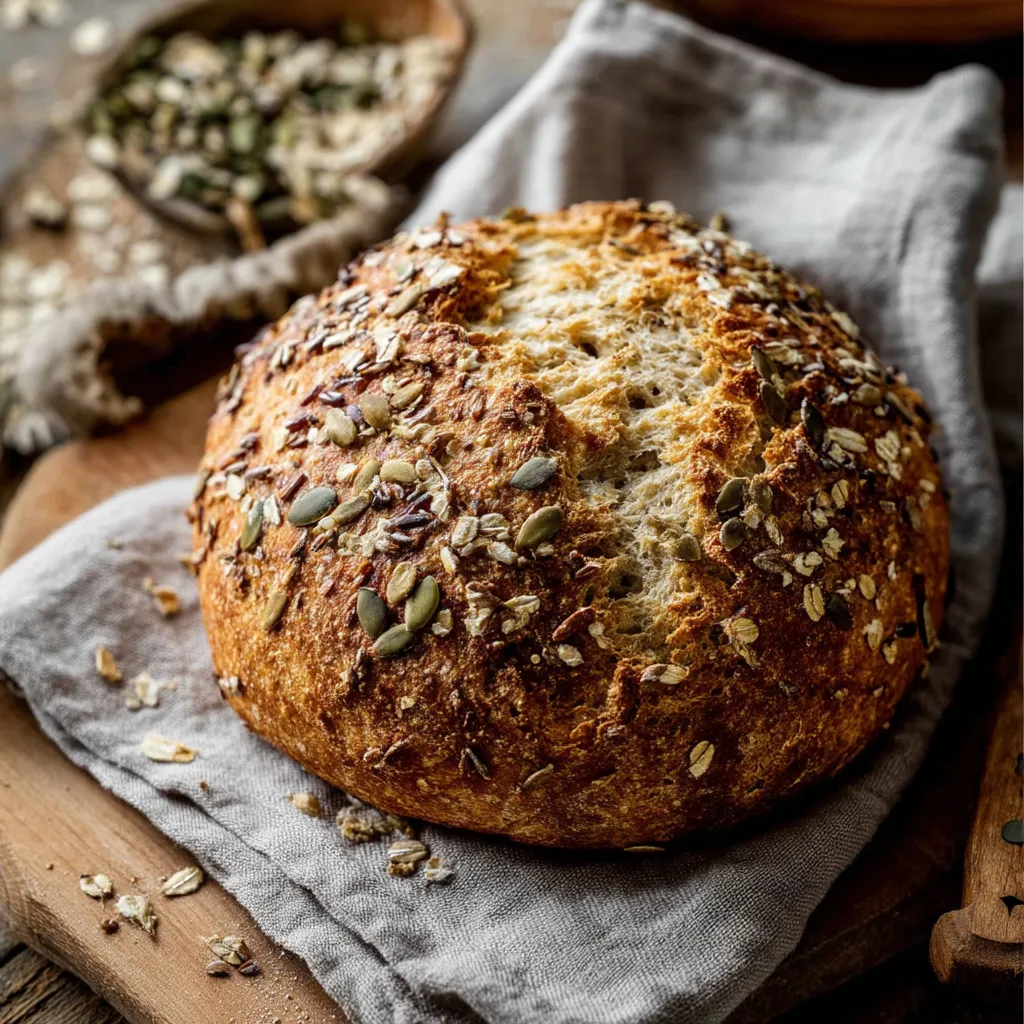
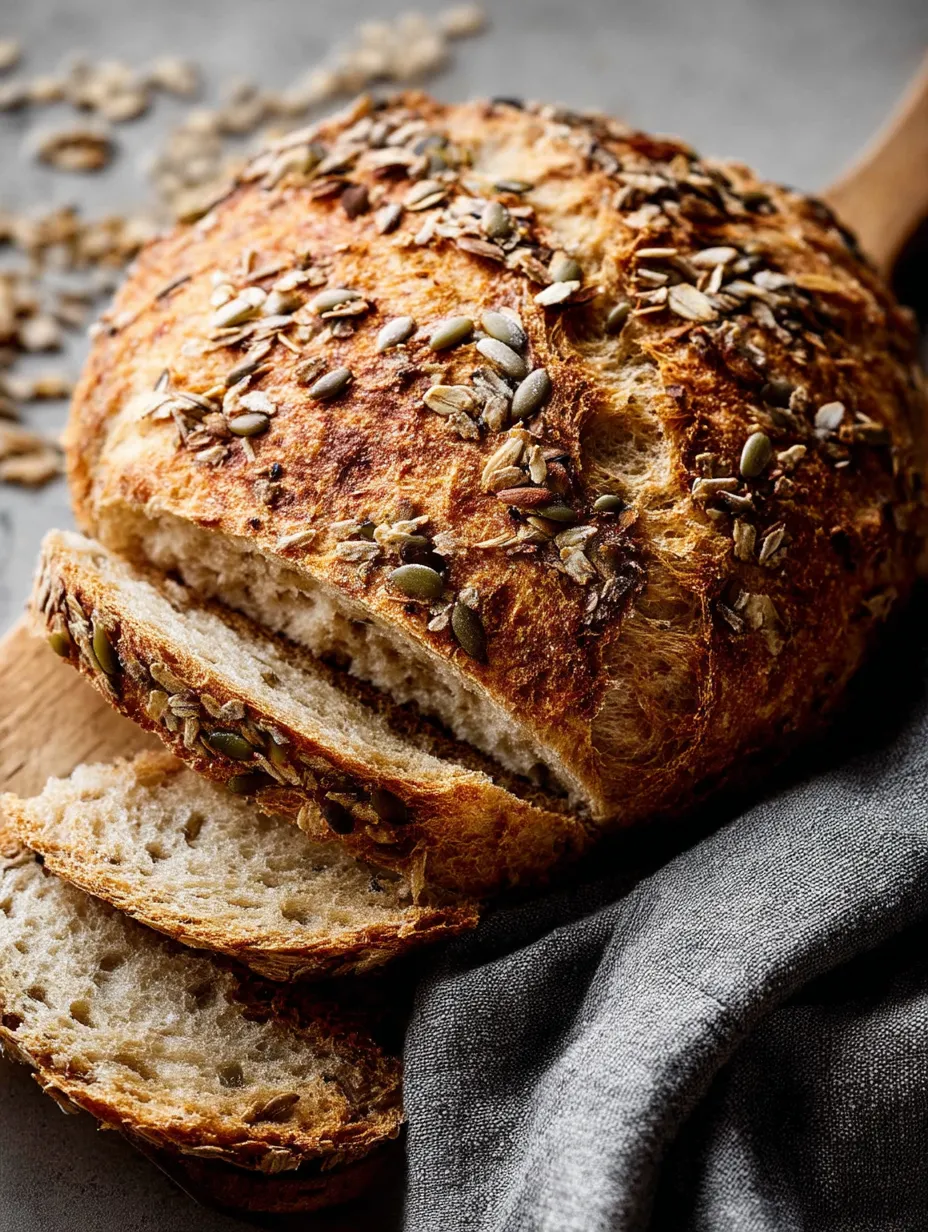
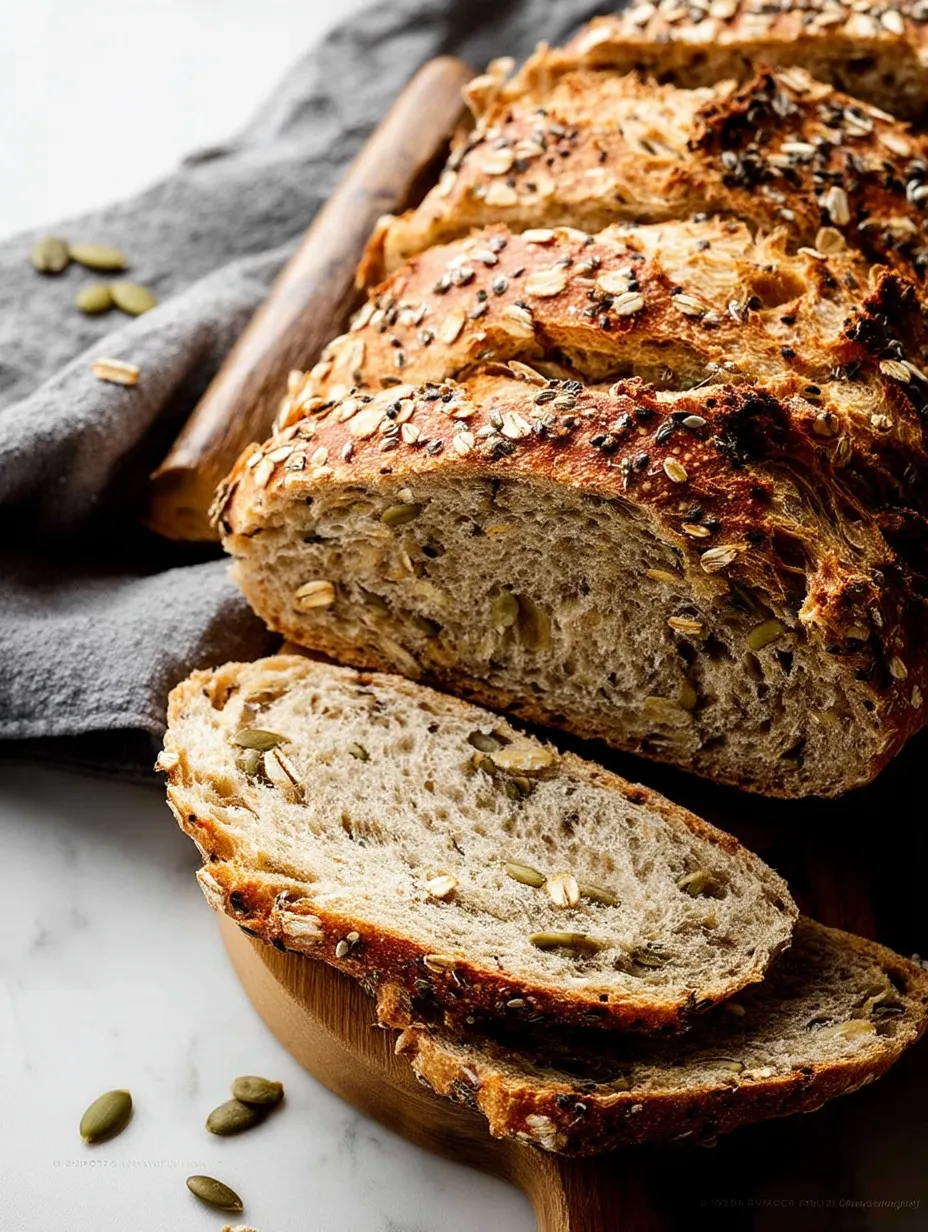
Crusty golden exterior giving way to a chewy, seed-studded interior creates a bakery-quality loaf with minimal effort. This artisanal bread combines nutritious seeds and hearty oats in a dough that develops incredible flavor without kneading. The simple technique produces a rustic loaf that looks professional but requires mostly hands-off time, making it perfect for both beginners and experienced bakers alike.
I discovered this bread technique during a particularly busy week when I wanted fresh bread but couldn't commit to traditional kneading and multiple rises. The first loaf emerged from my oven with such a professional appearance and depth of flavor that it became an immediate family favorite. My neighbor actually asked which bakery I'd visited when I brought over a still-warm loaf last winter.
Essential Elements
- Bread flour: creates a stronger, more elastic dough that traps gases effectively during fermentation
- Whole rolled oats: absorb moisture during rising, expanding to create hearty texture throughout the loaf
- Coarse sea salt: provides better flavor distribution than table salt while enhancing the natural nuttiness of the seeds
- Instant yeast: allows for reliable rising without the need for proofing or activating beforehand
- Pumpkin seeds: contribute rich, buttery flavor and satisfying crunch both inside and on top of the loaf
- Sunflower seeds: add delicate texture and subtle sweetness that balances the heartier elements
- Flax seeds: bring nutritional benefits and a pleasant visual element with their tiny, distinctive appearance
- Honey: introduces gentle sweetness while helping achieve that perfectly springy interior texture
- Warm water: activates the yeast effectively, helping it overcome the additional weight of oats and seeds
Baking Brilliance
- Combine Dry Components:
- In a large mixing bowl, whisk together bread flour, oats, salt, and instant yeast until thoroughly combined.
- Add Nutritious Seeds:
- Stir in your pumpkin, sunflower, and flax seeds, distributing them evenly throughout the dry mixture.
- Prepare Wet Ingredients:
- Combine warm water with honey, stirring until the honey dissolves completely.
- Create Shaggy Dough:
- Pour the warm honey water into the dry ingredients and stir with a wooden spoon or spatula.
- Allow Initial Rise:
- Cover the bowl with plastic wrap or a clean kitchen towel and let the dough rise at room temperature for about 3 hours.
- Develop Complex Flavor:
- Transfer the bowl to the refrigerator for at least 2 hours or up to 3 days.
- Shape With Minimal Handling:
- When ready to bake, use well-floured hands to gently shape the cold dough into a round boule shape.
- Add Textural Topping:
- Sprinkle additional seeds and oats on the exterior of your shaped dough.
- Create Steam Environment:
- Whether using a dutch oven or baking sheet, creating steam during baking develops that professional bakery-style crust.
- Score For Expansion:
- Just before baking, use a sharp knife or bread lame to cut a shallow pattern across the top of the dough.
- Bake Until Golden:
- Bake until the crust develops a deep golden-brown color and the loaf sounds hollow when tapped.
- Cool With Patience:
- Allow the baked bread to cool on a wire rack for at least 1 hour before slicing.
I particularly love making this bread during winter months when the warm oven and incredible aroma create such a cozy atmosphere. My daughter has started calling it our "weekend ritual" bread since we often mix it on Friday evening and bake it Saturday morning. The honey in the dough gives it just enough sweetness to make wonderful toast, but it's still savory enough for sandwiches and dipping in soup.
Perfect Pairings
- With Soup:
- Serve thick slices of this robust bread alongside a hearty vegetable soup for a complete meal.
- Breakfast Toast:
- For breakfast, toast slices until golden and top with creamy avocado and poached eggs.
- Cheese Board:
- When entertaining, create an impressive cheese board with this bread as the centerpiece.
 Pin it
Flavor Variations
- Fruit & Nut Version:
- Transform this versatile loaf by incorporating dried cranberries and chopped walnuts.
- Savory Herb:
- For a more savory direction, add 2 tablespoons of fresh rosemary and a tablespoon of lemon zest.
- Cheese Lover's:
- Cheese lovers can fold in 1 cup of shredded aged cheddar or crumbled feta before shaping.
Storage Solutions
- Short-Term Storage:
- Keep this bread at its absolute best by storing it cut-side down on a cutting board for the first day.
- Longer Storage:
- For longer storage, wrap the completely cooled loaf in a clean kitchen towel.
- Freezing:
- If keeping beyond two days, slice the entire loaf and freeze portions in airtight containers.
 Pin it
Creating this seeded bread connects me to a tradition of baking that spans generations, yet with a modern, simplified approach. There's something deeply satisfying about combining such simple ingredients and returning hours later to find them transformed into something so impressive. The process requires patience more than skill, making it perfect for busy days when you want homemade quality without constant attention. When I slice into a fresh loaf, revealing the beautiful seed-speckled interior, I'm reminded that some of the best things in life require waiting, but very little work.
Frequently Asked Questions
- → Why doesn't this bread need kneading?
- This bread uses time instead of kneading to develop the gluten structure. The long rising time (3 hours at room temperature plus optional refrigeration) allows the gluten to develop naturally, creating the structure needed for good bread without any physical kneading.
- → Can I substitute the seeds with other ingredients?
- Absolutely! You can customize the seeds based on your preferences. Use more of what you like, omit what you don't, or try other seeds like poppy seeds or chia seeds. Just aim to keep the total amount of seeds around 1/2 cup of larger seeds and 2 tablespoons of smaller seeds.
- → Is the refrigeration step really necessary?
- While you can bake the bread immediately after the first 3-hour rise, refrigerating the dough for at least 12 hours significantly improves the flavor and texture. The cold fermentation allows for deeper flavor development and makes the dough easier to handle.
- → Why is my dough so sticky and hard to shape?
- The high hydration level makes this dough naturally sticky, which is normal and contributes to the bread's moist interior. Use generously floured hands when shaping, and remember that this bread is meant to have a rustic appearance, so it doesn't need to be perfectly shaped.
- → Can I make this bread without a Dutch oven?
- Yes! While a Dutch oven creates an excellent environment for bread baking, this recipe is designed to work well on a regular baking sheet. The optional steam method (adding water to a pan in the oven) helps create a similar effect to baking in a Dutch oven, giving you a crispy crust.