
 Pin it
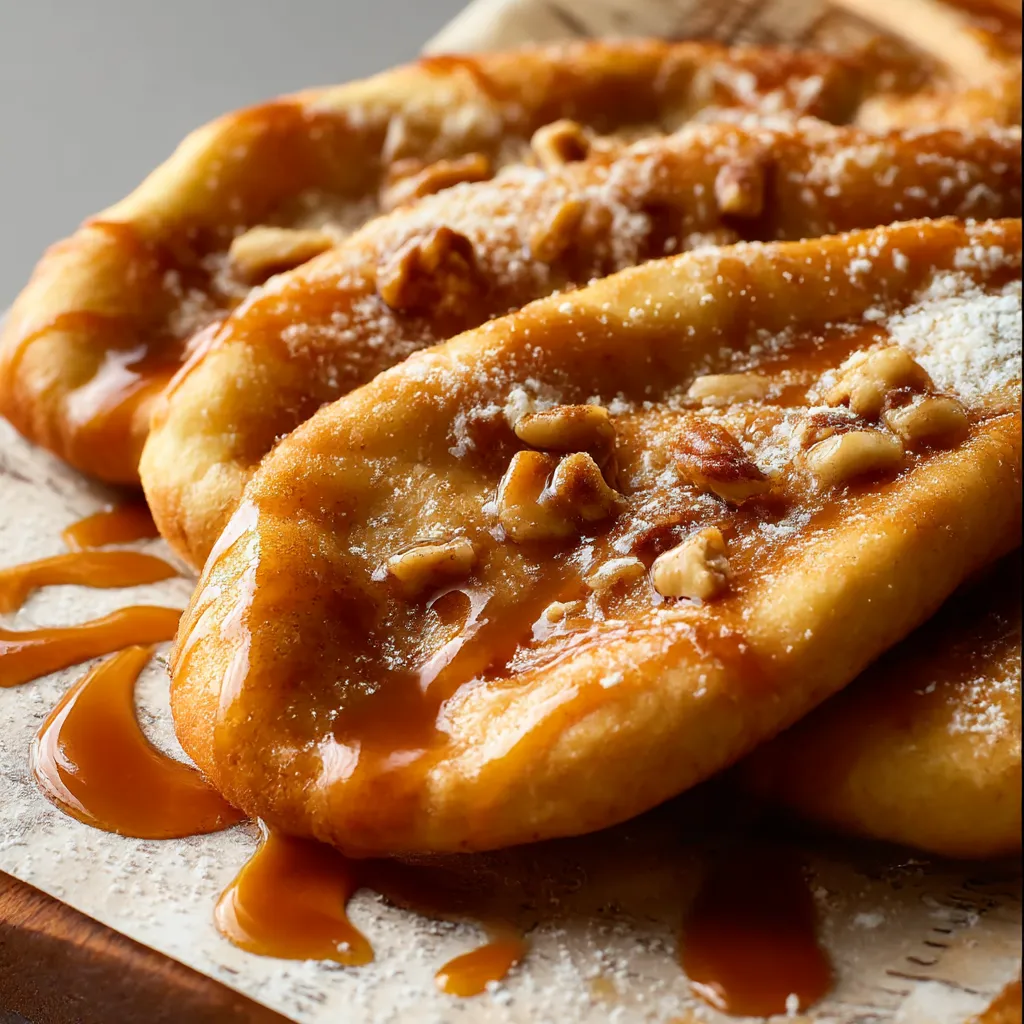
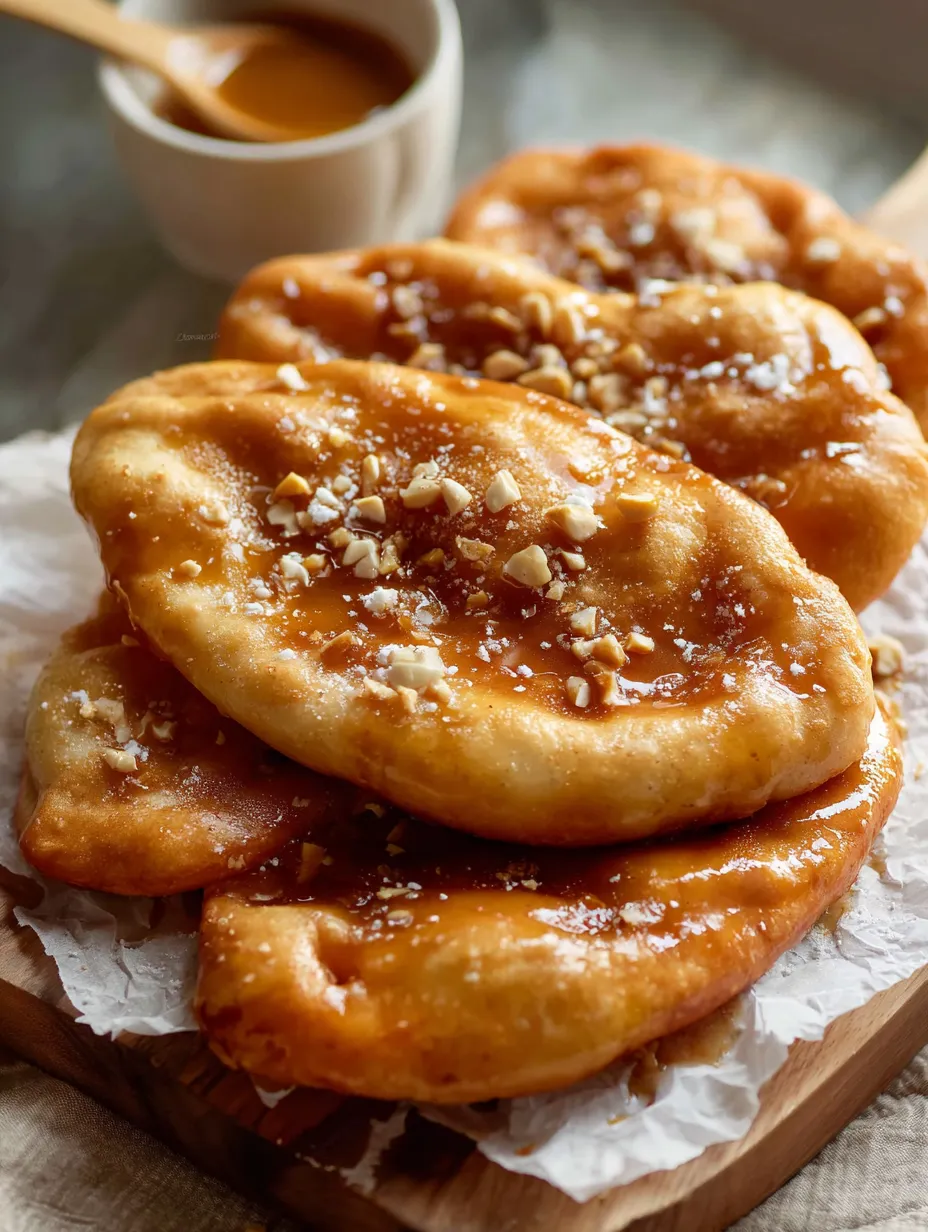
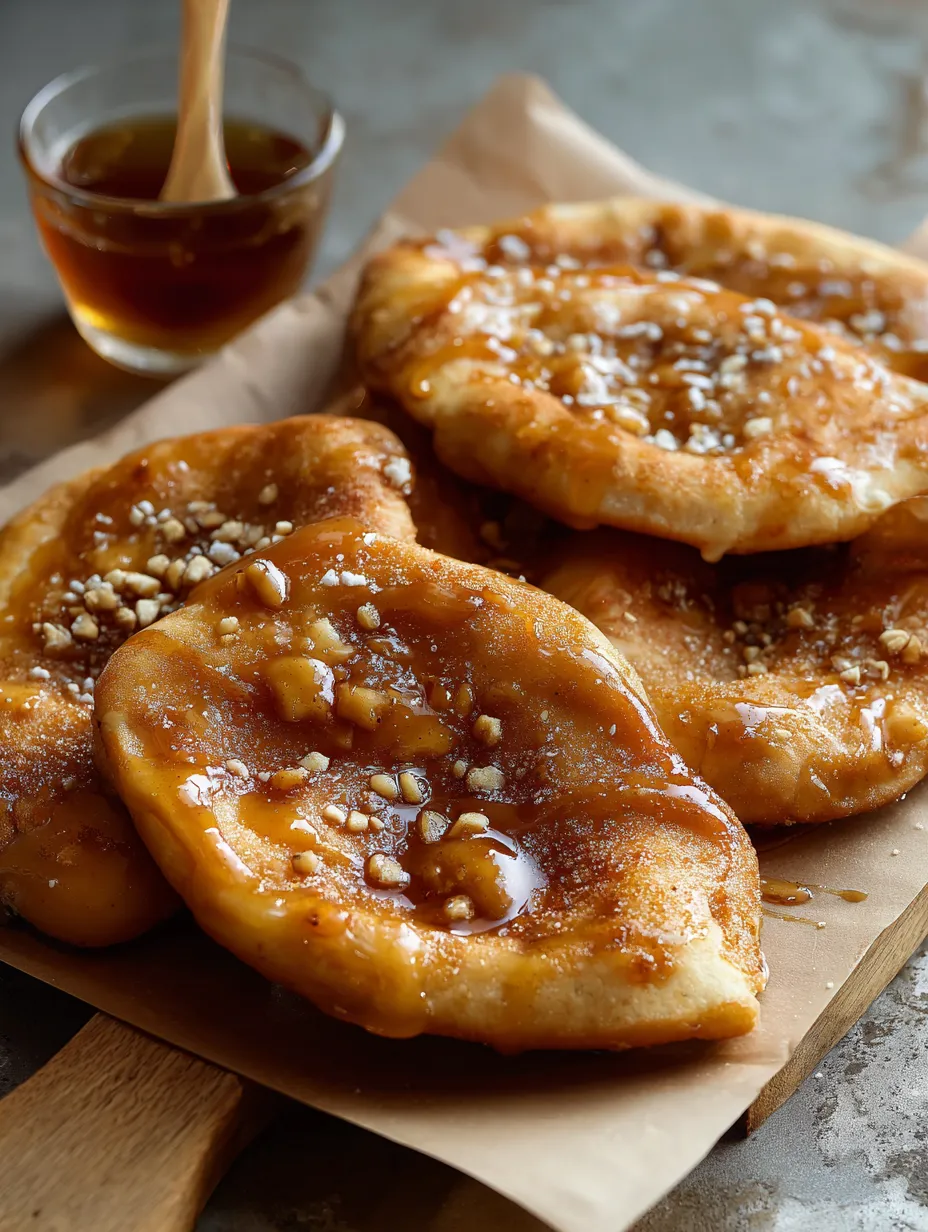
Maple Beaver Tails are a favorite treat I first discovered on a chilly visit to Canada. Imagine biting into fluffy fried dough, crispy at the edges and soft in the center, all glossy with a rich maple glaze. With this recipe, you can bring a taste of this Canadian street food classic right to your own kitchen.
When I tried Beaver Tails for the very first time in snowy Ottawa, it instantly became one of my all time favorite desserts. Making them at home now brings back a flood of sweet memories.
Ingredients
- Instant yeast: Gives the dough a light and airy lift. Choose a high quality brand for best results
- Lukewarm water and whole milk: Combined for just the right dough texture. Make sure both are just warm to the touch not hot
- White sugar: Feeds the yeast and adds flavor. Opt for pure cane sugar if possible
- Salt: Balances flavor and makes the dough tasty. A fine sea salt works best here
- All purpose flour: The base of the dough. Choose an unbleached flour for a more wholesome taste
- Unsalted butter: Both in the dough and glaze. Adds richness. Use high quality European style butter if available
- Vegetable oil: Needed for frying. Use fresh and neutral flavored oil
- Vanilla extract: Lifts the maple glaze with aroma. Pure vanilla is best
- Maple syrup: The star of the glaze. Always use real maple syrup. Grade A amber is classic
- Powdered sugar: Gives sweetness and silky texture to the glaze. Sift for the smoothest finish
Step-by-Step Instructions
- Activate the yeast:
- Combine the warm water and milk in a large bowl. Sprinkle the instant yeast over top and whisk until dissolved. Let sit for about five minutes until slightly foamy. This means the yeast is working
- Mix and knead the dough:
- Add sugar, flour and salt to the yeast mixture. Using a stand mixer with a dough hook or by hand, mix until a ragged dough forms. Pour in the melted butter. Knead for about one minute. The dough should pull cleanly from the sides and feel soft and elastic not sticky
- First rise:
- Gently oil a large bowl and place the dough inside. Cover tightly with plastic wrap then a towel. Set in a warm draft free spot. Let the dough rise for about one hour until it has doubled in size. This step builds lightness in the final beaver tails
- Brown the butter for glaze:
- In a saucepan, melt the butter over medium heat. Let it sizzle and bubble, stirring occasionally. After five to six minutes it will smell toasty and turn golden brown. Pour immediately into a mixing bowl to avoid burning. It is the secret to an amber color and deep flavor in the glaze
- Finish maple glaze:
- Into the browned butter bowl, add vanilla extract, maple syrup and powdered sugar. Whisk until fully smooth with no lumps. Set aside. The glaze should be pourable and glossy
- Shape dough:
- Gently punch down the risen dough and divide into six or seven equal pieces. Roll each into a ball. Oil your hands very lightly to keep things from sticking. Press each into a long oval. It should be thin for maximum crispiness. Frying will puff it up
- Fry the beaver tails:
- Heat about one inch of vegetable oil in a deep skillet to three hundred fifty degrees Fahrenheit. Carefully lower one or two ovals at a time into the hot oil. Fry on one side until bubbles form and the bottom looks golden, about one and a half minutes. Flip and fry the other side another minute. Remove with tongs to a wire rack to drain
- Glaze and serve:
- Brush the warm beaver tails generously with maple glaze right after frying. Optionally dust with powdered sugar. These are best enjoyed fresh and hot with sticky fingers
 Pin it
I always get a little excited when I open a new bottle of real maple syrup The scent reminds me of early mornings at my grandmother’s house and how the flavor pairs so well with anything warm and bready Just pouring it into the browned butter for this glaze makes my whole kitchen smell magical
Storage Tips
Leftover beaver tails can be wrapped in parchment and kept in an airtight container at room temperature for up to one day For longer storage refrigerate them but the texture is always best the first day For reheating pop them into a warm oven for a few minutes instead of a microwave This brings back most of the crispiness If you end up with extra glaze it can be stored in a jar in the fridge for up to five days Warm briefly before using
Ingredient Substitutions
You can swap instant yeast for active dry yeast but you will need to dissolve it in the warm liquid for a few extra minutes before mixing If you prefer a less sweet glaze a bit less powdered sugar still works beautifully Almond milk can substitute for whole milk in the dough for a dairy free version and coconut oil works in place of butter in both the dough and glaze
Serving Suggestions
Maple Beaver Tails are delicious both plain and with fun toppings Try a sprinkle of cinnamon sugar a few chocolate chips or a thin spread of Nutella just after glazing Some folks love crushed pecans or even a scoop of vanilla ice cream on top for a real treat
 Pin it
Cultural Context
Beaver Tails have deep Canadian roots showing up in winter festivals skating rinks and city street fairs across the country A true sign you are in Canada is seeing folks lined up at red BeaverTails shacks for a warm treat on a frosty day Recreating them at home is a way to share a slice of Canadian coziness wherever you are
Frequently Asked Questions
- → What makes the dough fluffy and crisp?
The combination of instant yeast, warm milk, and a short kneading time helps achieve a soft, elastic dough which fries up fluffy inside and crisp outside.
- → How do I brown butter for the glaze?
Melt butter over medium heat and cook until it bubbles and develops a golden-brown color and nutty aroma. Avoid burning by stirring and watching closely.
- → Can I make these in advance?
The dough can be prepared ahead and refrigerated after the first rise. Fry and glaze just before serving for best texture and flavor.
- → What oil is best for frying?
Use a neutral oil like vegetable or canola, heated to 350°F to ensure even, golden frying without overpowering the sweet glaze flavor.
- → How do I shape the dough portions?
Divide the dough into sections, roll each into a ball, and flatten into ovals with oiled hands or a rolling pin to ensure a tender texture.
- → Is maple syrup essential for the glaze?
Maple syrup adds signature flavor, but if unavailable, substitute with honey or a vanilla icing for a different sweet finish.