
 Pin it
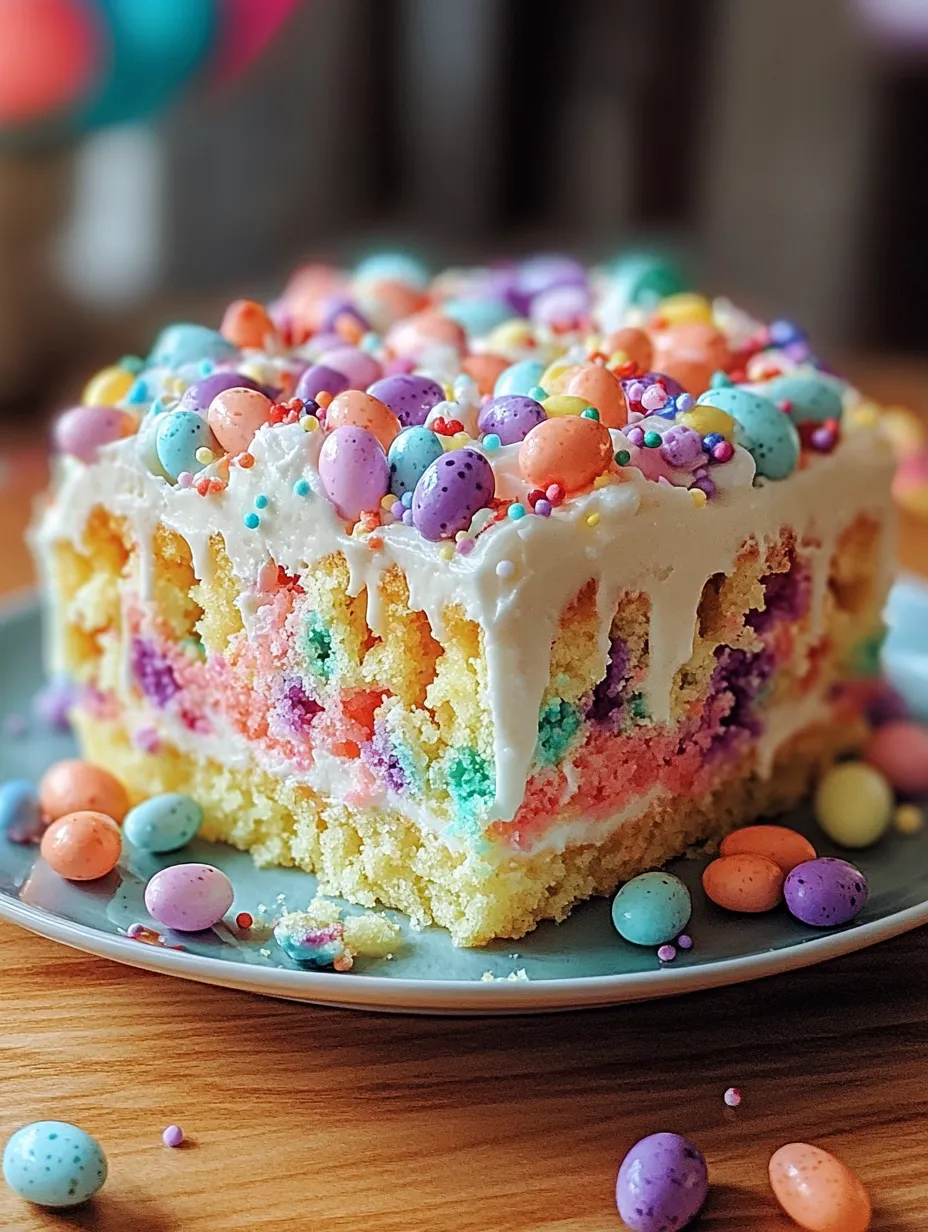
Easter poke cake delivers vibrant swirls of color and flavor in every slice, creating a dessert that's as beautiful as it is delicious. This festive treat combines a moist white cake with fruity gelatin infusions and a cloud-like whipped topping, all finished with playful spring decorations. Perfect for Easter gatherings or any springtime celebration, this cake brings joy to both the eyes and taste buds.
I first made this cake for a family Easter gathering, somewhat skeptical that something so simple could create such an impact. The moment I sliced into it, revealing vibrant ribbons of color swirled throughout each piece, the entire table gasped with delight. What began as an experiment has become our most anticipated Easter tradition, with everyone eager to see which color combinations I'll choose each year.
Essential Ingredients
- White cake mix: Creates the perfect neutral canvas for colorful gelatin
- Strawberry and lime gelatin: Provide vibrant color and fruity flavor throughout the cake
- Boiling water: Activates the gelatin for proper infusion into the cake
- Whipped topping: Offers a light, creamy counterpoint to the sweet cake
- Easter sprinkles: Add festive flair and celebratory touch
- Optional coconut: Creates a "nest" effect when tinted with food coloring
Preparation Method
- Bake The Cake:
- Preheat your oven to 350°F (175°C) and prepare a 9×13-inch baking dish with nonstick spray. Mix the white cake batter according to package directions, which typically involves combining the mix with eggs, oil, and water. Pour the smooth batter into your prepared pan and bake for 25-30 minutes, or until a toothpick inserted in the center comes out clean. Allow the cake to cool in the pan for about 15 minutes—warm but not hot is ideal for the next step.
- Create The Colorful Infusion:
- While the cake cools slightly, prepare your gelatin mixtures. In separate bowls, dissolve each gelatin flavor (strawberry and lime) in 1 cup of boiling water, stirring until completely dissolved with no granules remaining. Using the handle of a wooden spoon, poke holes all over the cake's surface, spacing them approximately 1 inch apart. The holes should go almost to the bottom of the cake but not all the way through.
- Add The Color Magic:
- Carefully pour the prepared gelatin mixtures over different sections of the cake, alternating colors to create a marbled effect. You can pour in patterns or randomly for different effects. The gelatin will slowly sink into the holes, creating colorful tunnels throughout the cake. Cover the cake loosely with plastic wrap and refrigerate for at least 2 hours, though overnight is even better, allowing the gelatin to fully set and flavors to meld.
- Decorate For Easter:
- Once chilled and set, spread whipped topping evenly over the entire cake surface, creating a clean canvas for decorations. If using coconut, you can tint portions with drops of food coloring to create pastel "Easter grass," then sprinkle over sections of the cake. Add Easter-themed sprinkles, mini chocolate eggs, or other festive candies to complete the spring look.
My grandmother always said the most memorable desserts engage all the senses, and this Easter poke cake certainly delivers on that wisdom. The anticipation of cutting into the cake to reveal its colorful interior creates a moment of joy at any gathering. Following her advice to chill the cake overnight not only makes it more convenient for busy holiday preparations but truly enhances the flavor and texture beyond what you'd achieve with a shorter chill time.
 Pin it
Serving Suggestions
- Pair with fresh berries for a fruity contrast to the sweet cake.
- Serve alongside vanilla ice cream for an indulgent dessert option.
- Cut into small squares for an impressive addition to a dessert buffet.
- Create a dessert bar with various toppings for guests to customize their slices.
Storage Wisdom
- Store covered in the refrigerator for up to 3 days. The cake actually improves after the first day as the flavors continue to develop.
- For best presentation, add any delicate decorations like chocolate eggs just before serving.
- This cake does not freeze well after the gelatin has been added due to texture changes upon thawing.
Creative Variations
- Tropical Easter: Use pineapple and orange gelatin with coconut whipped topping and dried pineapple flowers for decoration.
- Pastel Dream: Create an ombré effect by using the same flavor gelatin in different pastel colors across the cake.
- Berry Burst: Use raspberry and blueberry gelatin with fresh berries pressed into the whipped topping.
- Lemon-Lime Twist: Combine lemon and lime gelatin for a citrus-forward version perfect for spring.
 Pin it
I've made this Easter poke cake for countless spring gatherings, and it never fails to bring smiles and excitement to the table. What makes it truly special is the moment of reveal when the first slice is cut, showcasing the vibrant interior that seems almost magical to guests. The combination of stunning visuals, moist texture, and fruity flavors creates a dessert experience that feels celebratory yet comes together with remarkable ease—exactly what a holiday dessert should be.
Frequently Asked Questions
- → Can I use a different flavor of cake mix?
- Absolutely! While white cake mix works best to showcase the colorful gelatin, you could use yellow cake or even funfetti for extra festiveness. Chocolate cake works too, though the gelatin colors won't be as visible.
- → How far in advance can I make this cake?
- This cake can be made up to 2 days in advance. In fact, it often tastes better after sitting in the refrigerator overnight, as the flavors meld together. Just wait to add any delicate decorations until shortly before serving.
- → Can I use sugar-free gelatin and light whipped topping?
- Yes! Sugar-free gelatin and light whipped topping work perfectly in this recipe for a lighter version. The cake will still have the same beautiful appearance and similar taste.
- → What's the best tool to poke holes in the cake?
- The handle end of a wooden spoon creates perfect holes that are large enough to hold plenty of gelatin. You can also use the tines of a fork or a meat tenderizer for smaller holes, though they won't hold as much gelatin.
- → Why do I need to let the cake cool before poking holes?
- Cooling the cake for about 15 minutes allows it to set enough that it won't completely fall apart when poked, but is still warm enough that it will readily absorb the gelatin. If the cake is too hot, the gelatin might just run off, while if it's too cool, it won't absorb properly.